Explore Your Dashboard
Get started with your first project on YarsaPlay with this detailed guide. We’ll be creating organization, learning role management, discussing different game modules and how to use them.
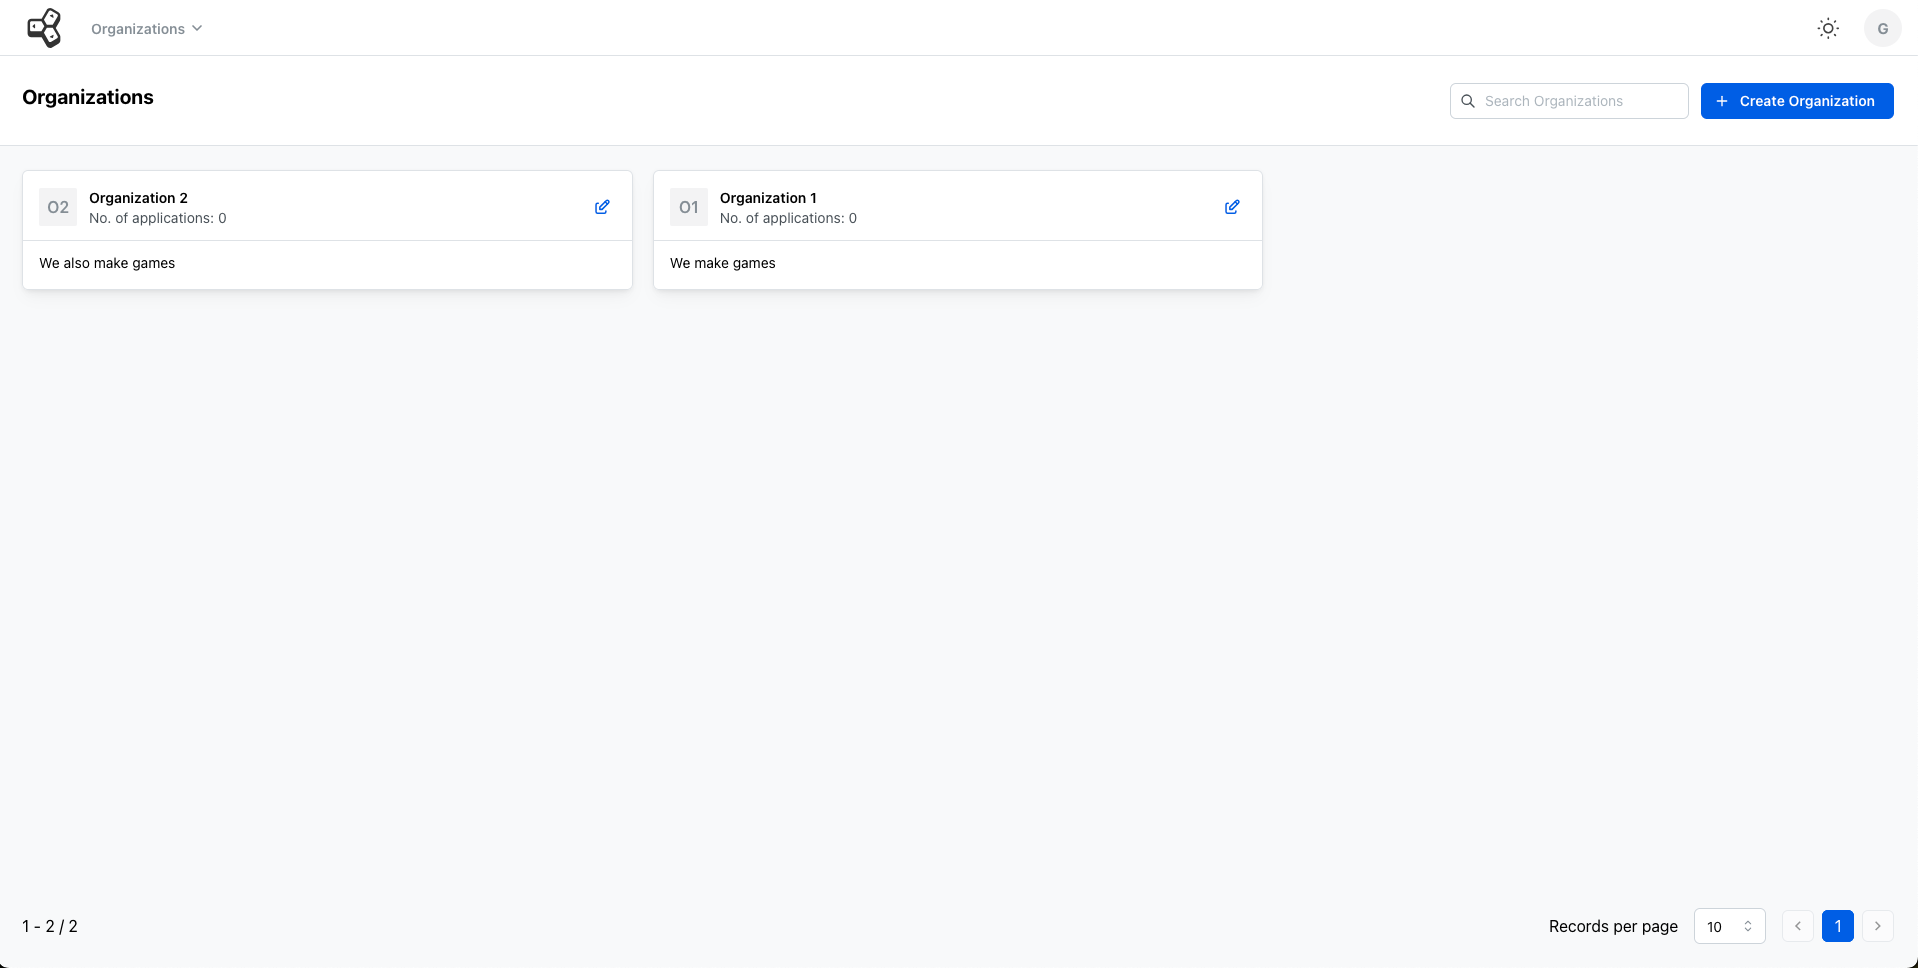
Organization Portal
After signing up and logging into your account, the Organization Portal will be accessible. By clicking on the Create Organization button, you’ll be able to create different accounts for each of your organization.
Organization in this context can be defined as your indie, small-scale or any size of game development company. You can also assign it any name as per your preference.
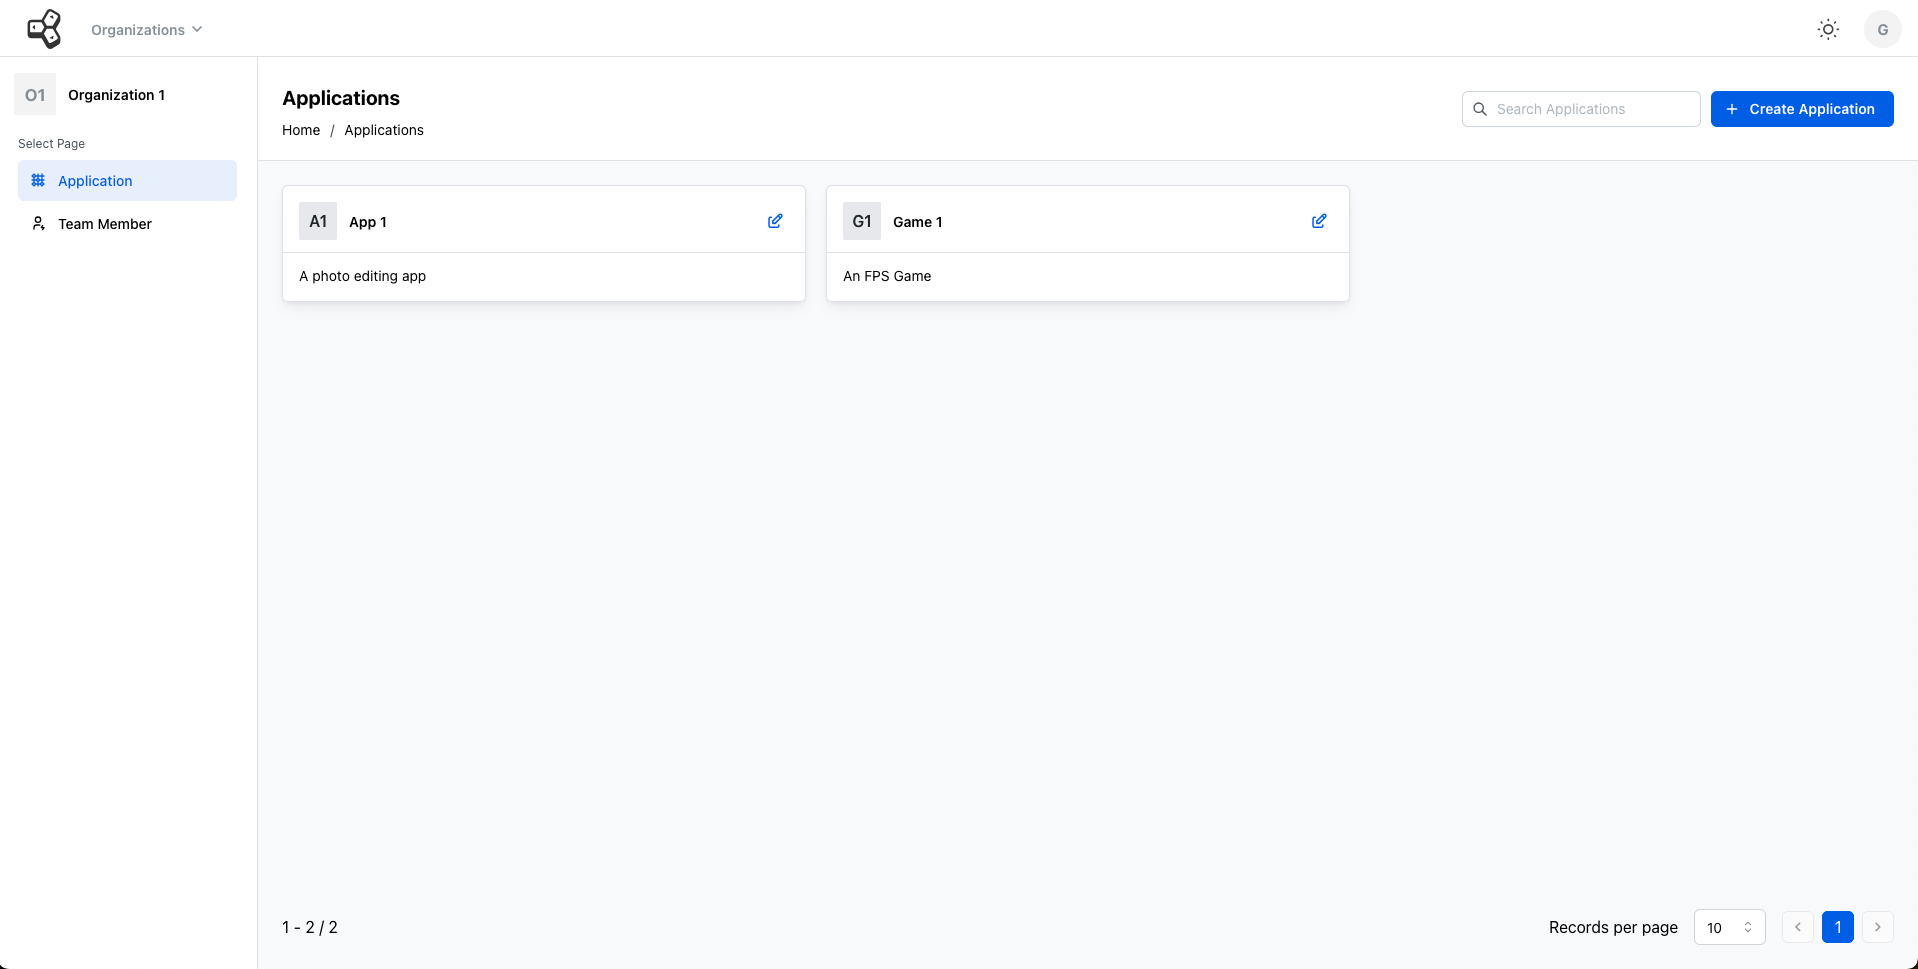
Application Portal
By clicking on your organization, you’ll access the Application Portal.
Here, you can create any game or app projects, and invite the team members that contribute towards building it via their email.
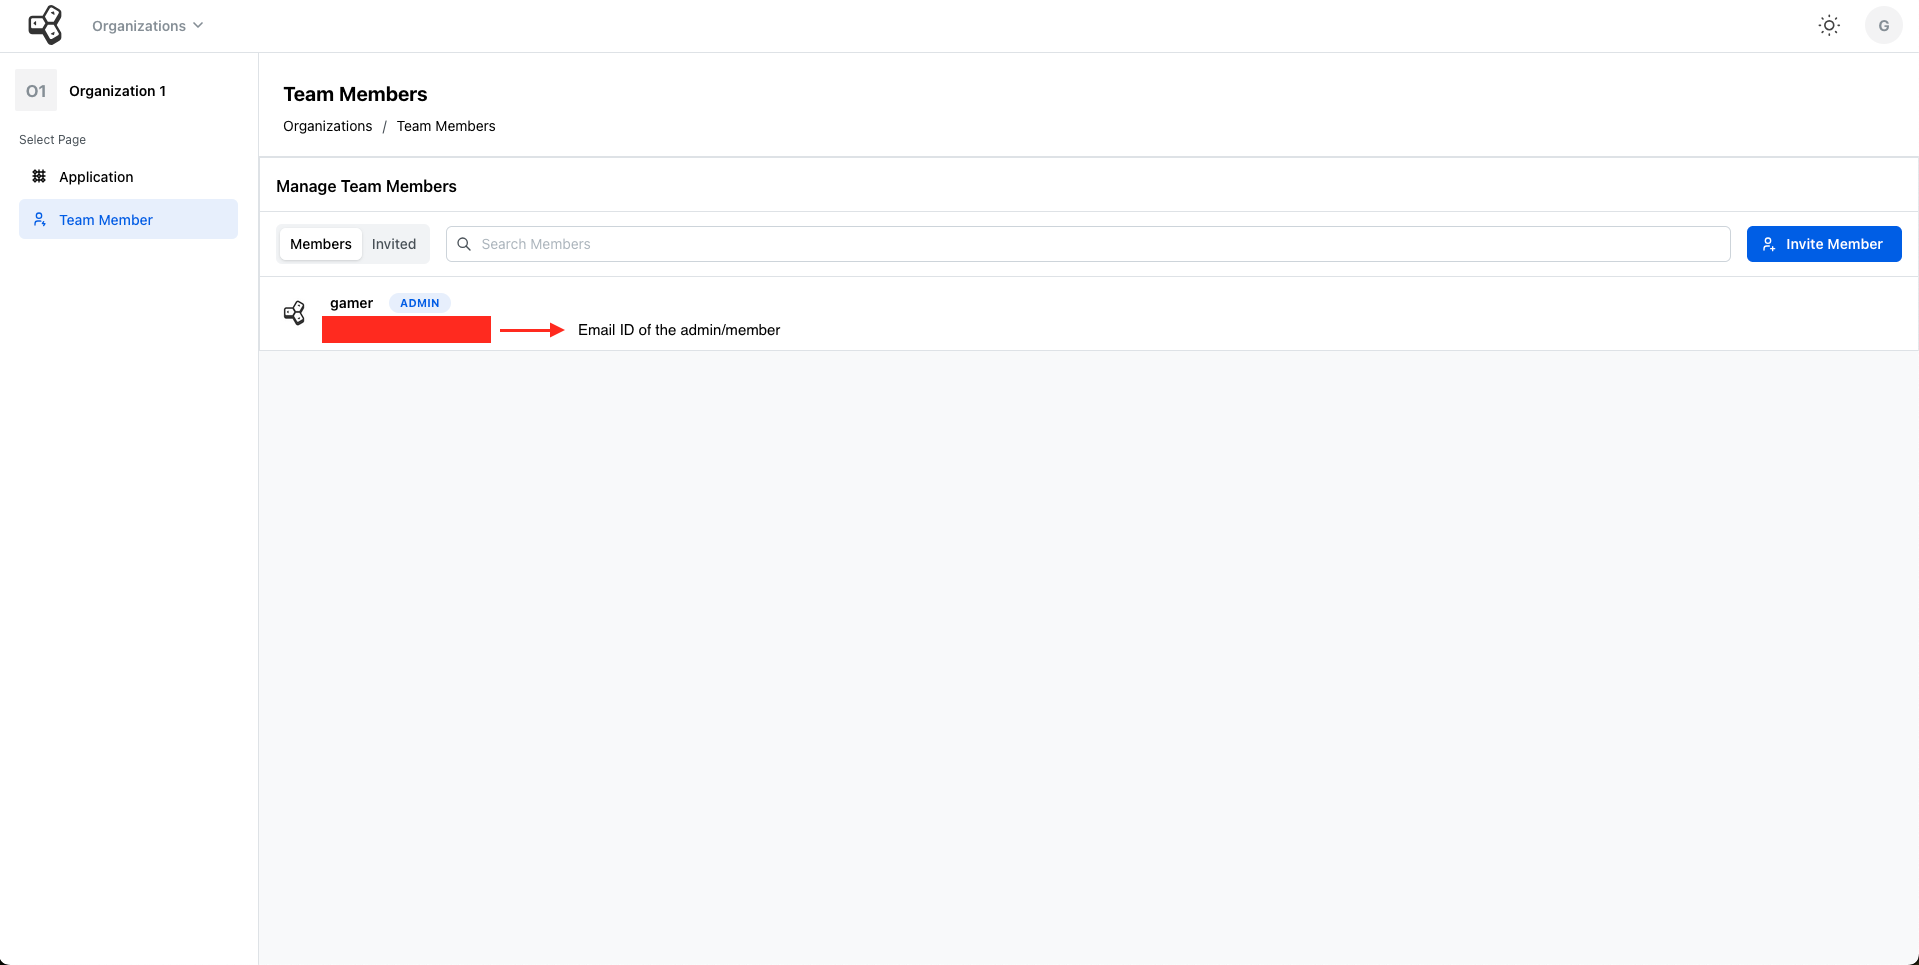
Once the invitation is sent, the invited member will receive an email with the link to your project. The member will show up on the Team Members list, once they accept your invitation.
Main Dashboard
The Overview
You can now start working on the projects! By clicking on either of your app projects, you can access the main dashboard.
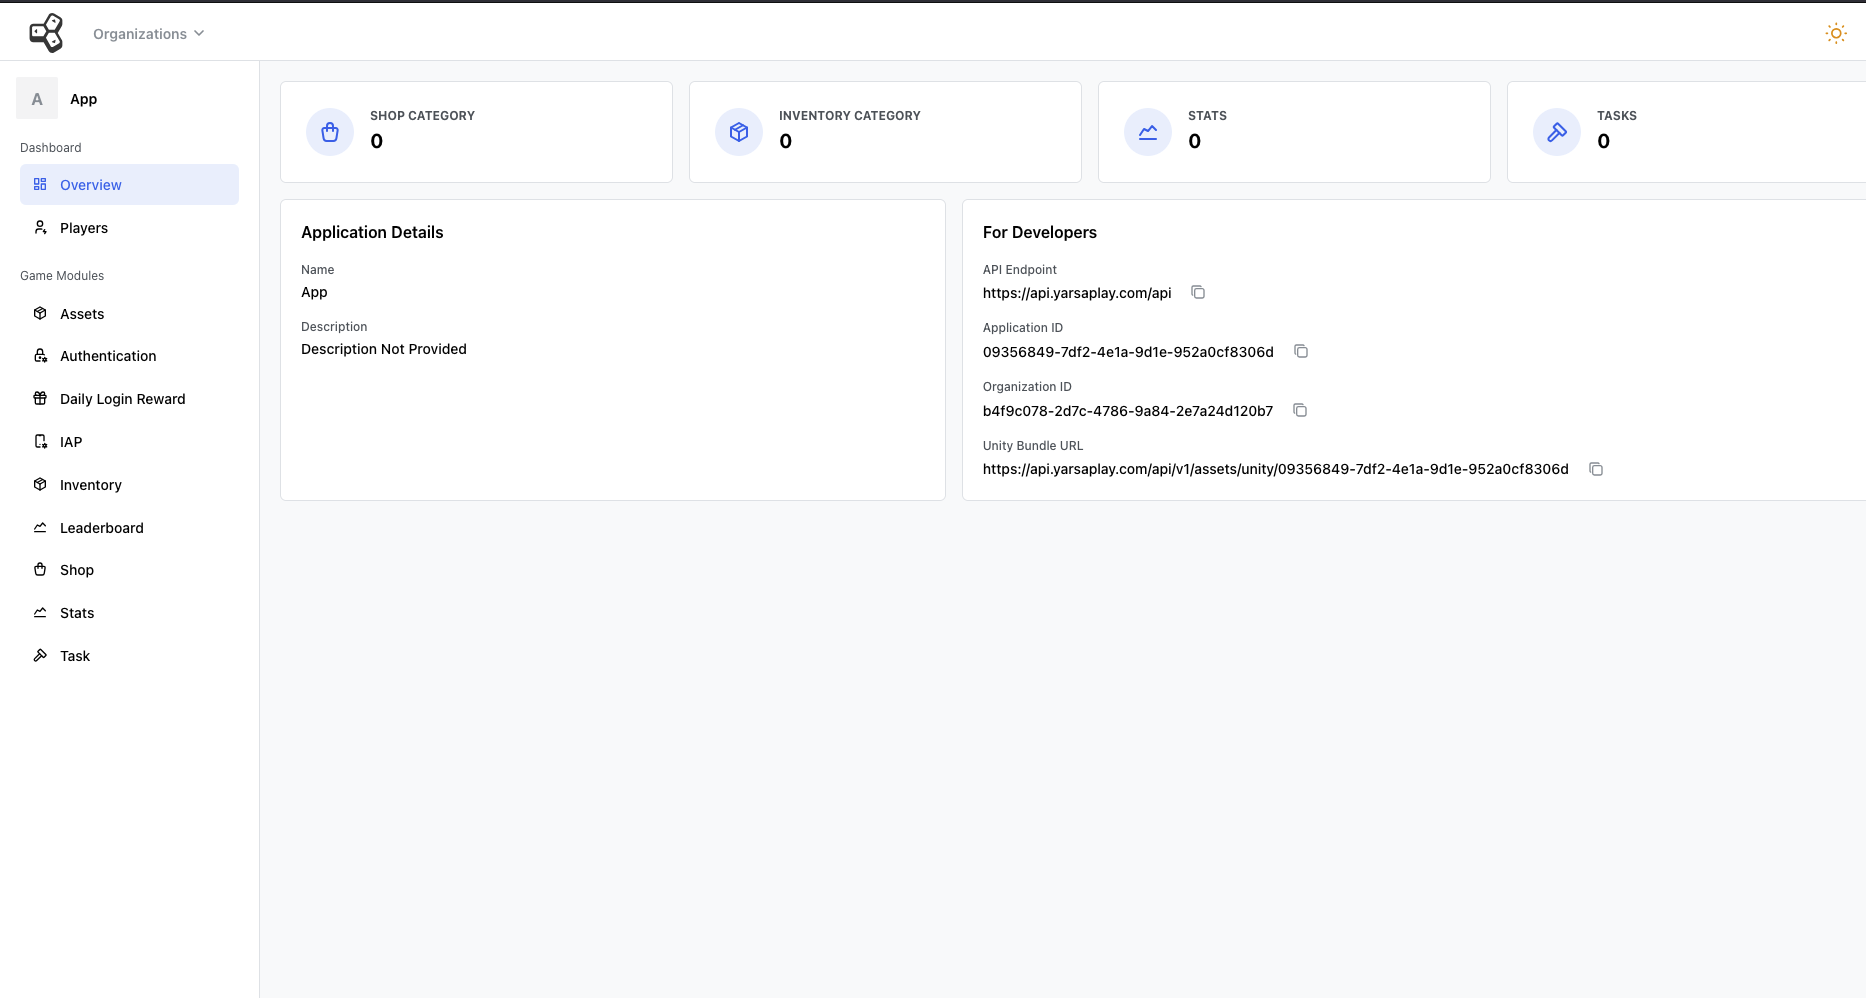
Here, you'll find all the active functions and crucial details needed to synchronize your game with the backend set up by YarsaPlay such as,
API Endpoint
This URL acts as the direct interface for your game to access various services such as user authentication, game state synchronization, leaderboard updates, and more. It forms the backbone of communication between your game's front-end and YarsaPlay's backend infrastructure, ensuring smooth and efficient gameplay experiences for your users.
- Endpoint: https://api.yarsaplay.com
Application ID
Each game project on YarsaPlay is assigned a unique App ID. This identifier is essential for authenticating and accessing game-specific data.
Your App ID for this project is: 09356849-7df2-4e1a-9d1e-952a0cf8306d
Organization ID
The Organization ID identifies your development team or organization within YarsaPlay. It is used for administrative and access control purposes.
Your Organization ID is: b4f9c078-2d7c-4786-9a84-2e7a24d120b7
Unity Bundle URL
For Unity developers, ensure your project is configured with the necessary Unity Bundle for seamless integration with YarsaPlay. Detailed instructions on bundling and deployment can be found here.
In the left panel, you can find all the modules discussed in the Understanding Modules article.
Refer to the detailed sections below for specific instructions on applying and implementing each component with your game.
Players
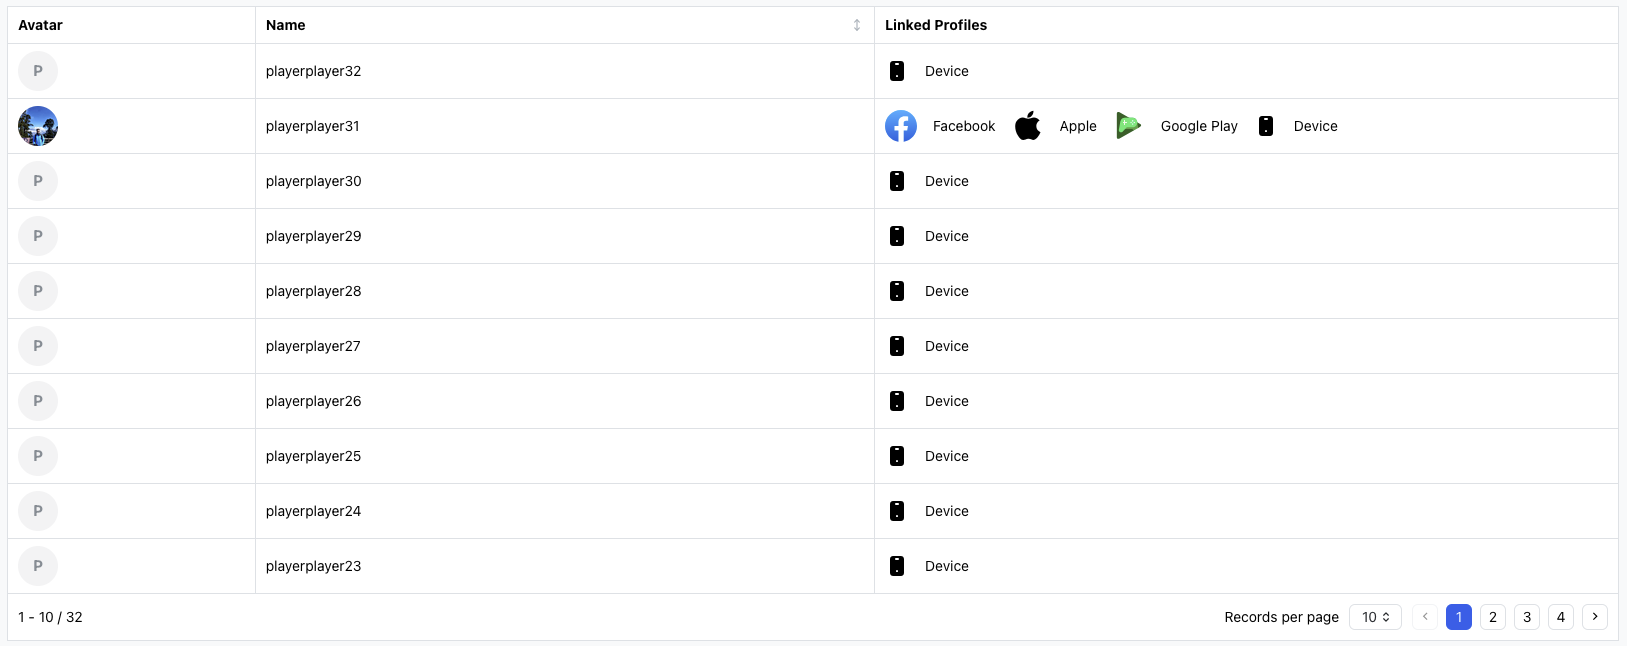
In the Player’s panel, you can view all the players who have logged into your game or your app with their device, Facebook, Google, or Apple accounts.
You'll be able to view their avatar in the game, as well as the name and email ID they used to log in to your app. Recently joined players appear at the top of the list.
Game Modules
The modules have been previously detailed in the Understanding Modules documentation. You can now explore their usage directly from the dashboard.
Auth
Streamline user login and social media linking with our Auth module. Please refer to the Authentication section from the Understanding Module documentation to familiarize yourself with the Authentication process and collect the details needed to enter in the empty fields in your dashboard.
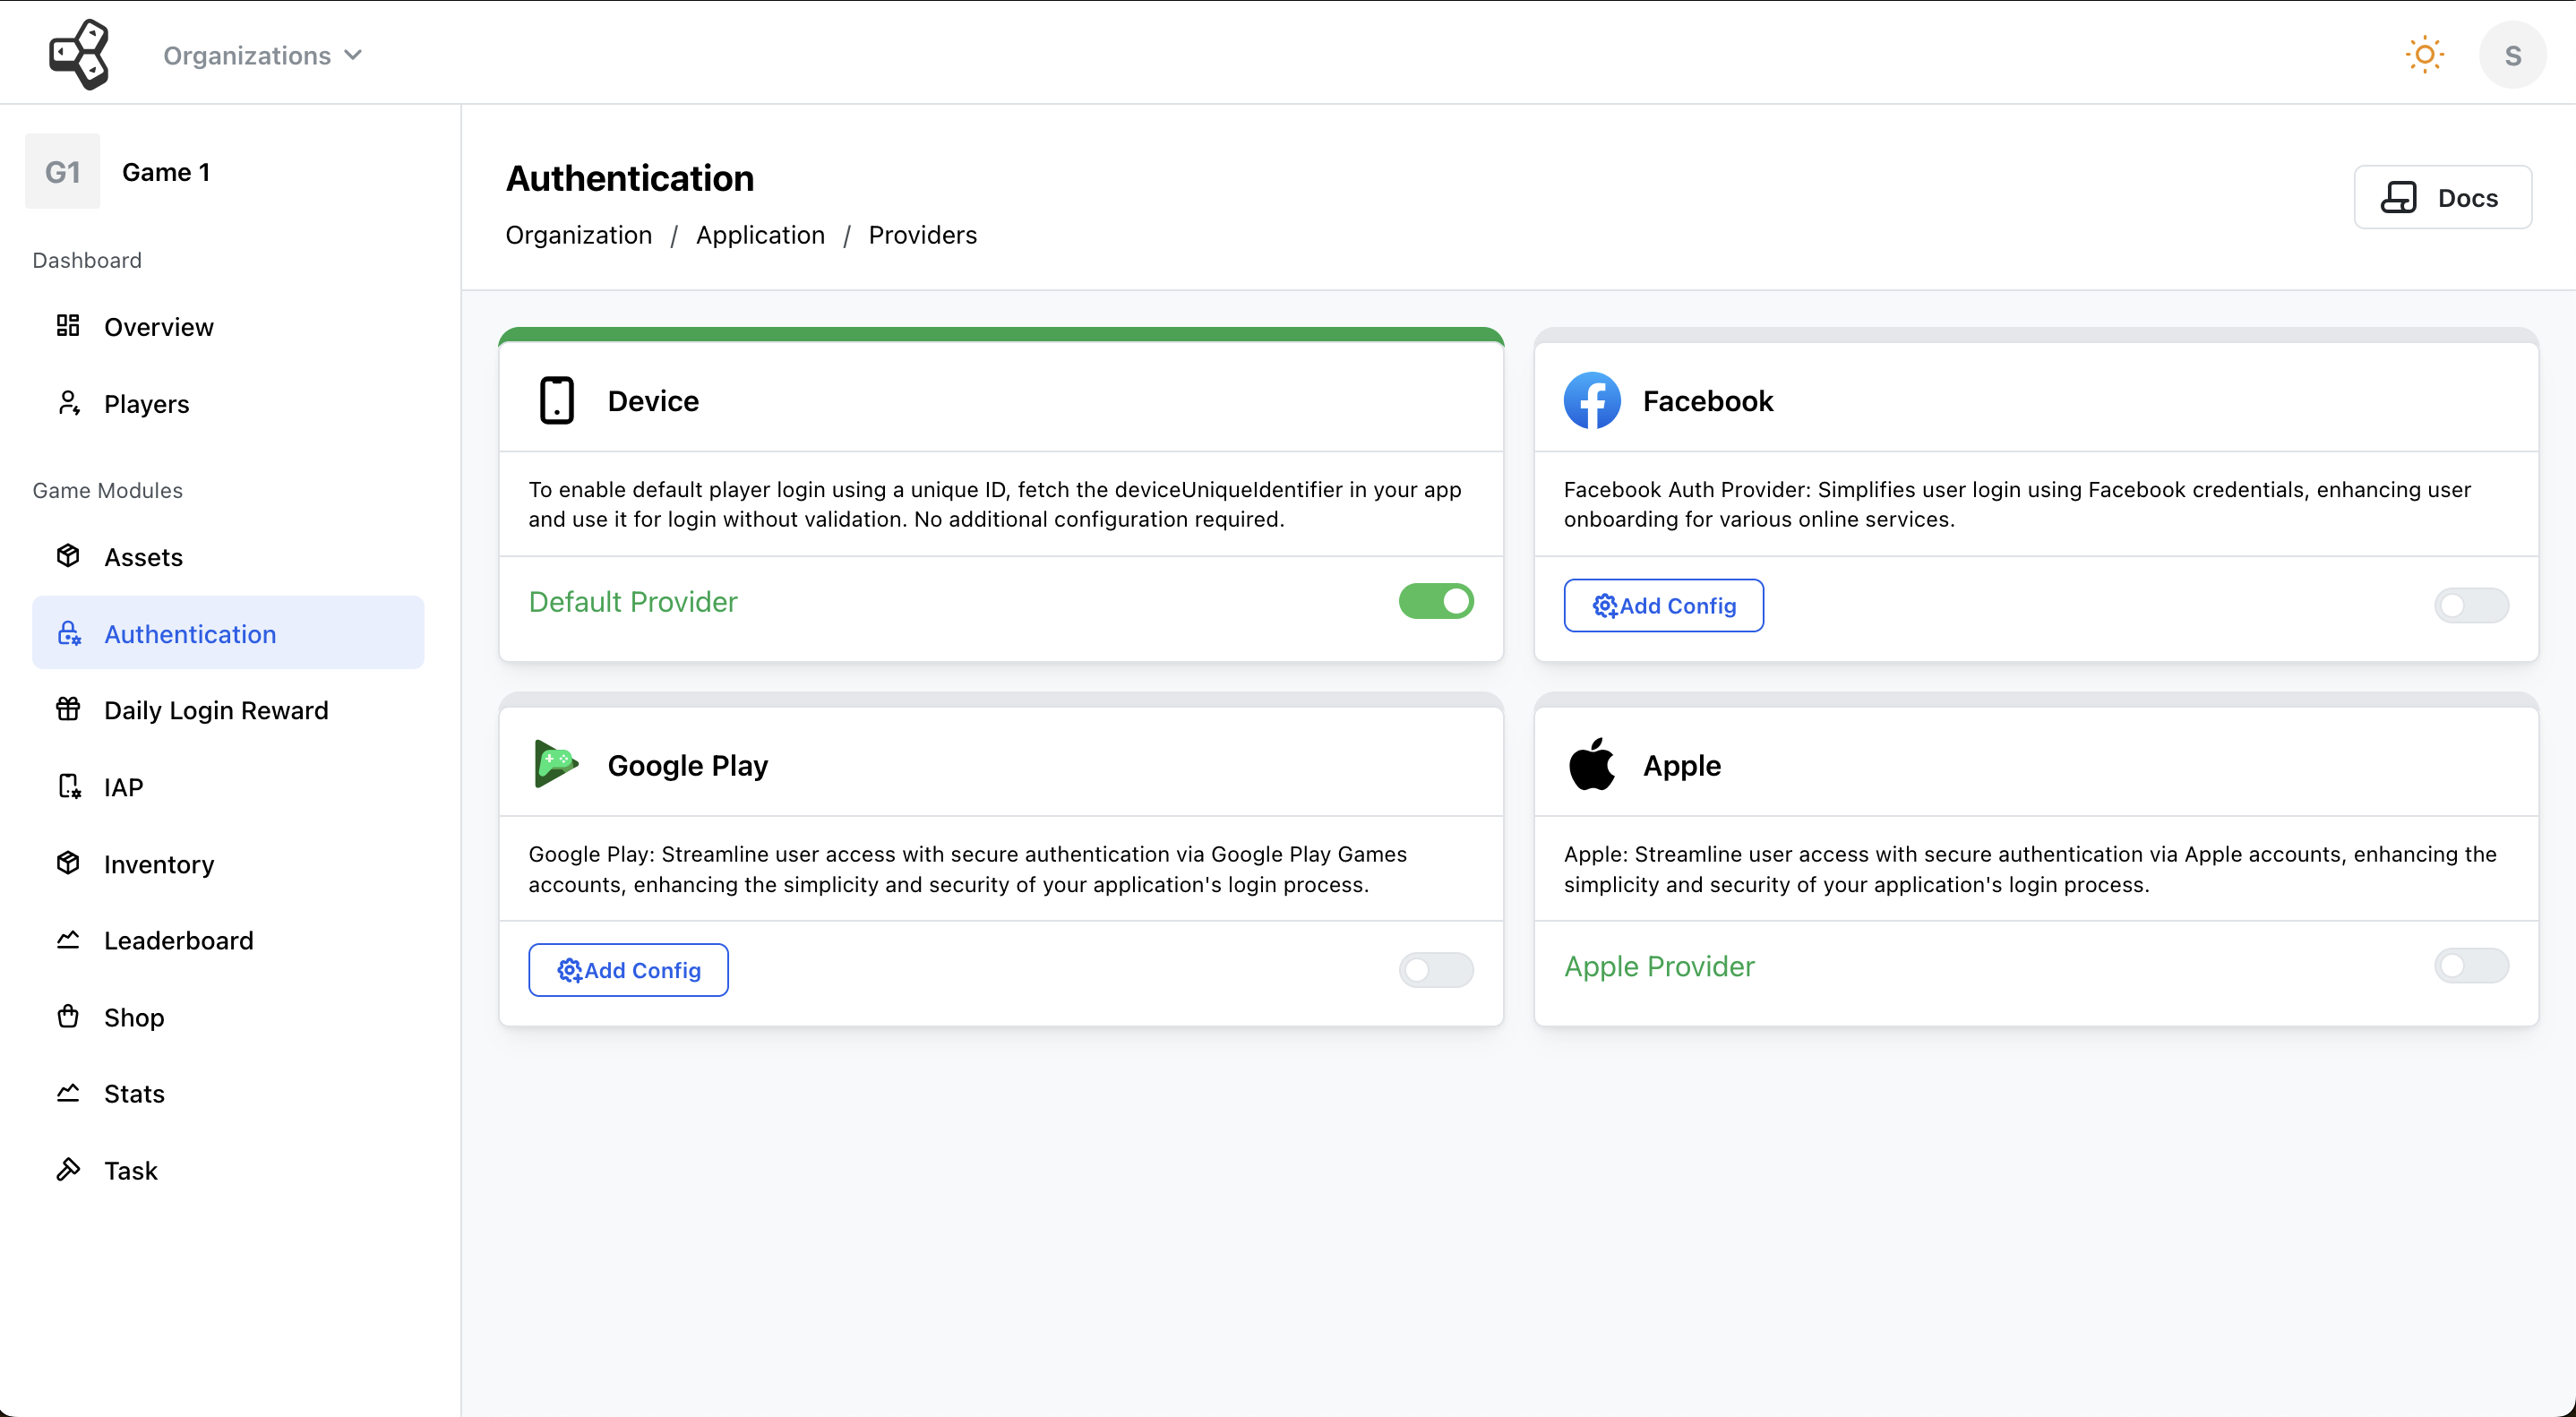
Continue the auth implementation by following the available API endpoints.
IAP
Easily integrate in-app purchase and validate with YarsaPlay’s effective IAP system that supports monetizing your in-game items, boosting your revenue and player engagement.
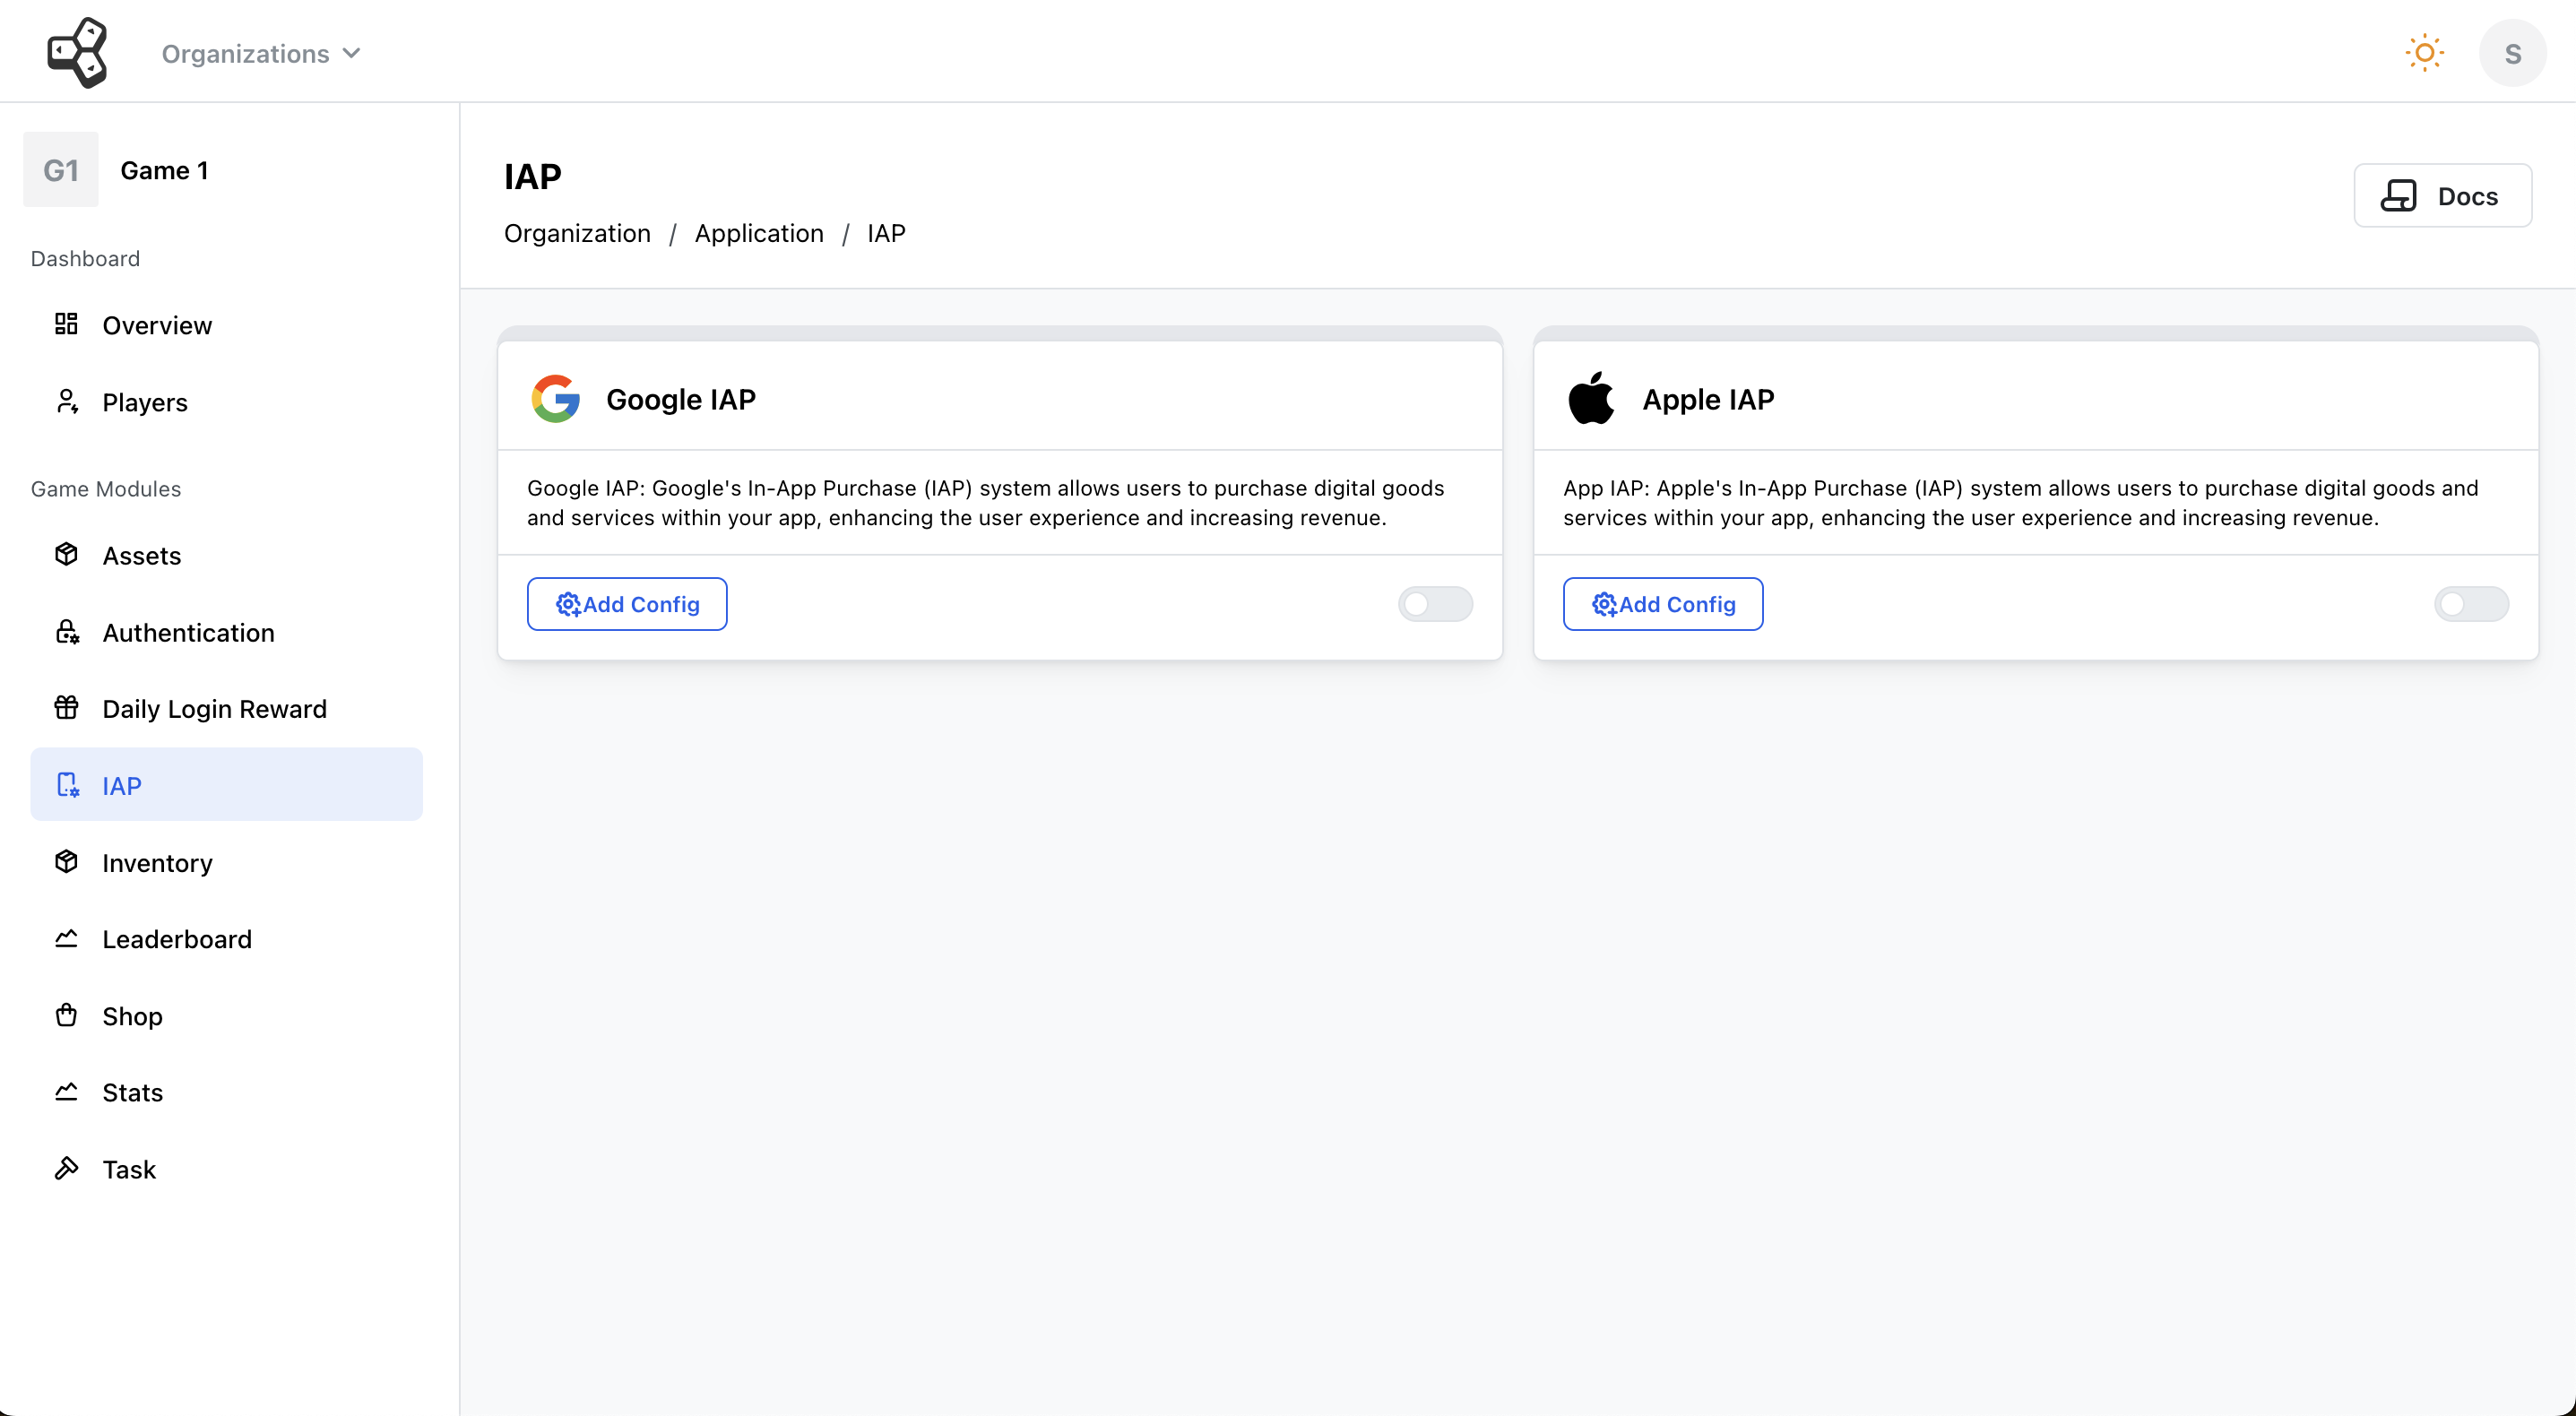
Please refer to the IAP section in Understanding Modules to get the necessary details for Google IAP and Apple IAP validation.
After following the steps to get clientID, clientSecret, and generate Refresh Token, enter them in their respective fields and click on Submit.
Once the details are submitted, you can perform API calls to validate the IAPs. Please refer to IAP article in API documentation for detailed instructions.
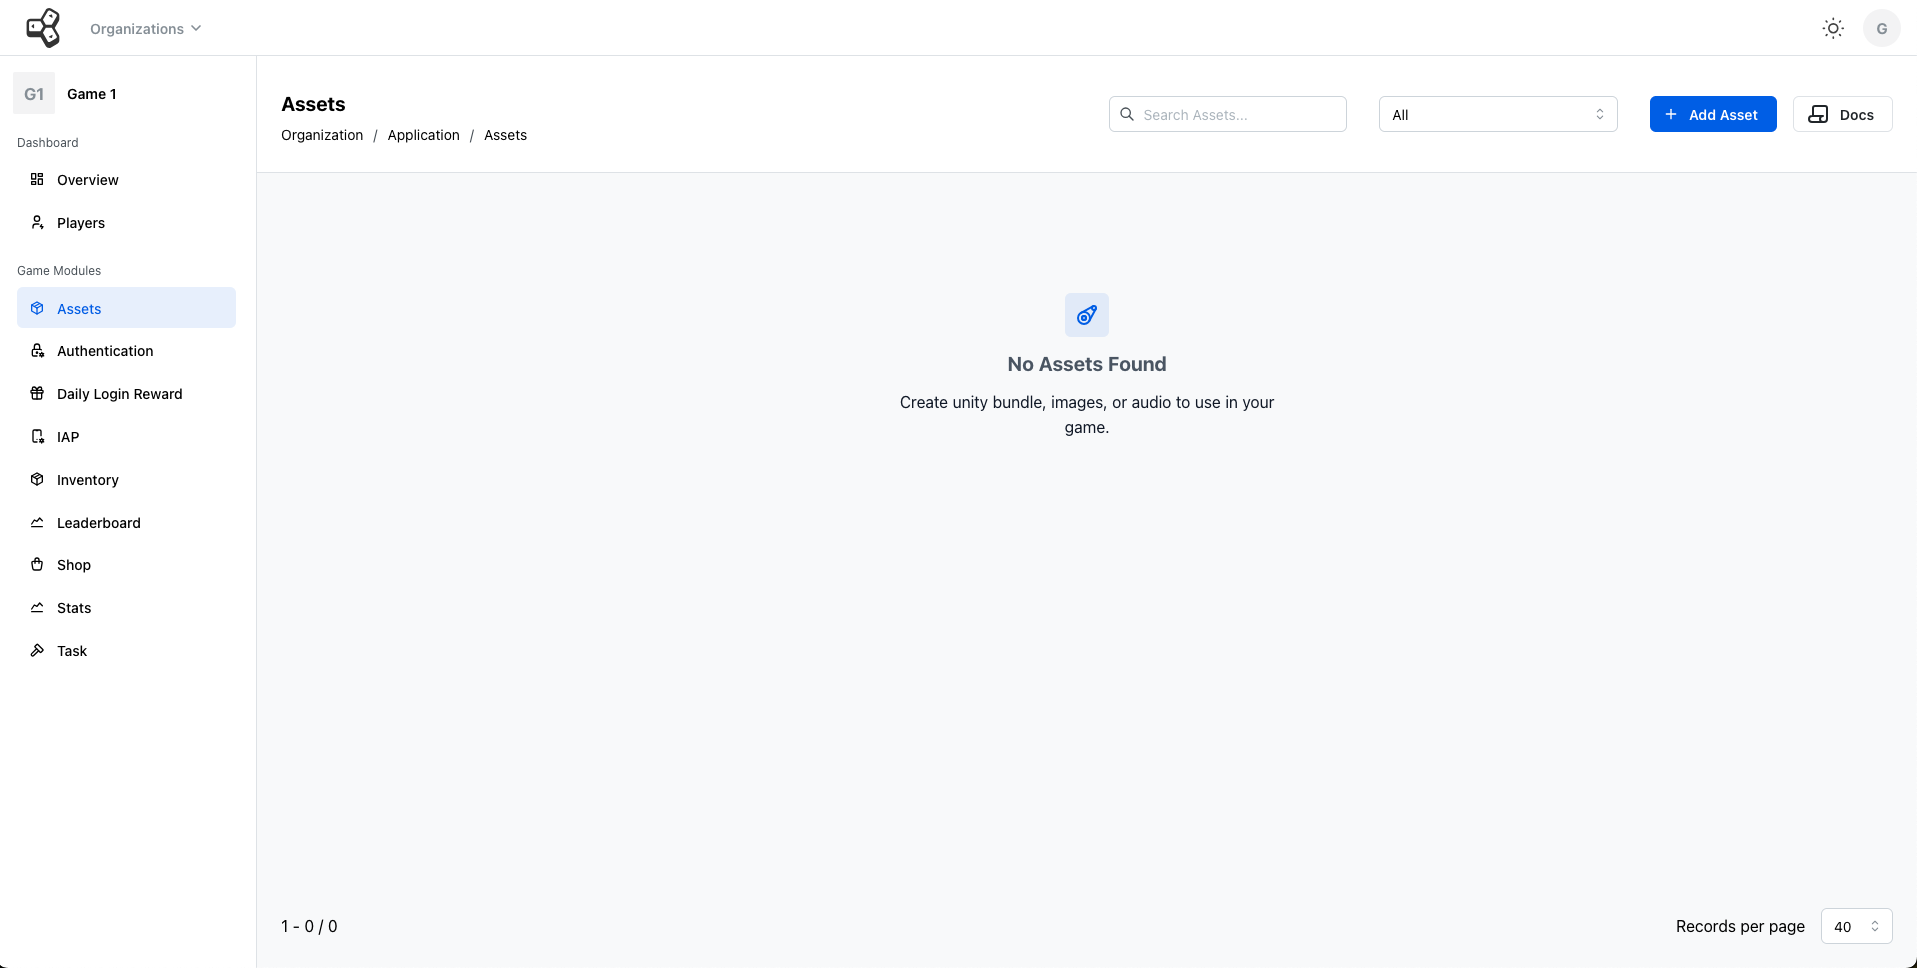
Assets
Assets are those elements that help you build the audio-visual aspect of your game. Character designs, power-ups, backgrounds, user interface components, and animations are all examples of assets that contribute to the overall aesthetic and functionality of your game.
To manage your game assets, Yarsa Play provides Assets module where you can upload, organize and filter all your important 3D renders, 2D sprites, audio files, scripts, and other resources essential for developing your game.
Supported File Formats
These are the supported file types and formats:
- Image:
.jpg,.png,.gif, and.webp - Audio:
.ogg,.wav,.webm,.mp3,.aacand.x-wav - Unity Addressable: JSON and Text Files
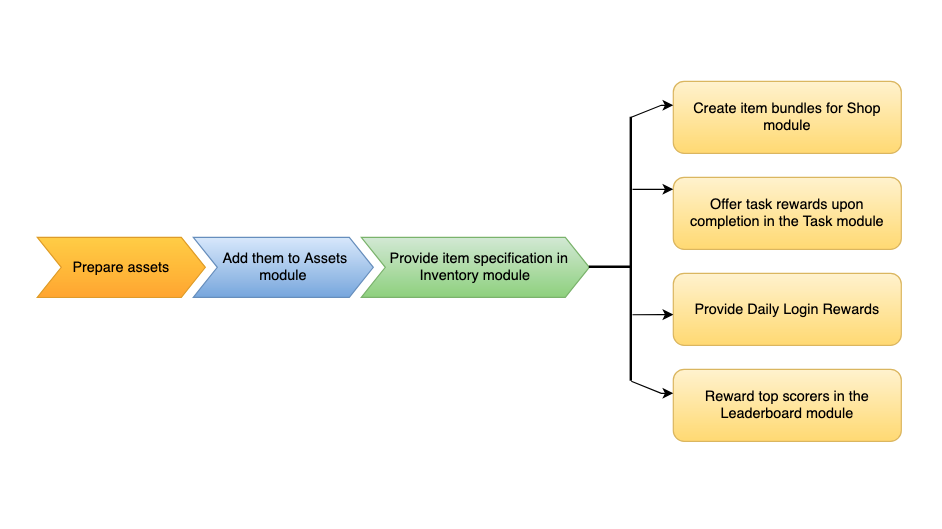
This asset module further supports inventory, which is directly linked with other modules in Yarsa Play like Shop, Daily Login Rewards, Task and more.
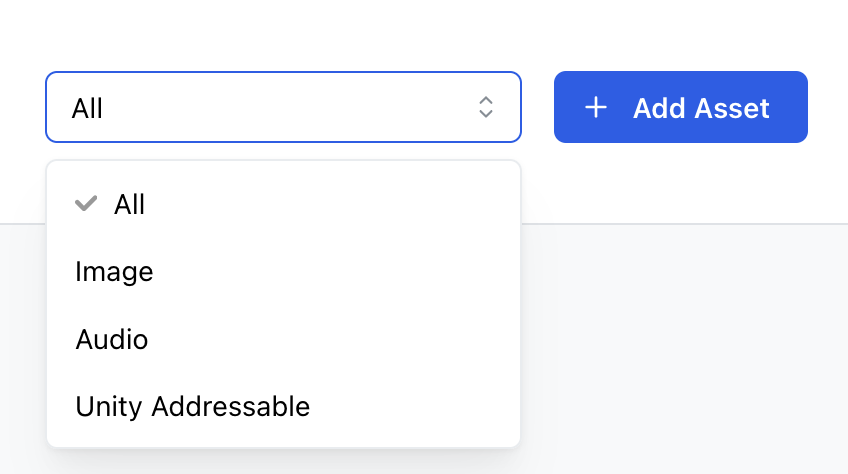
 You can filter these files by their file type using the dropdown filter option located in the top right corner.

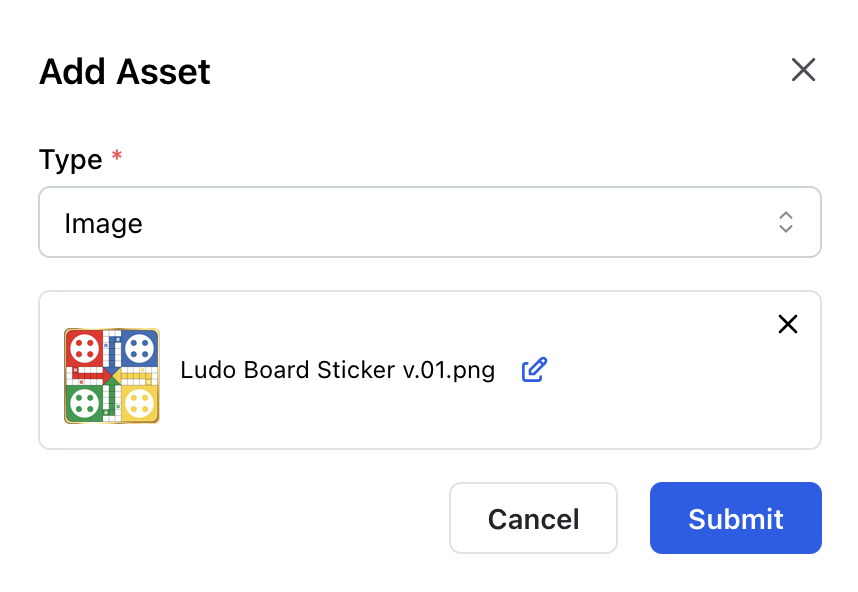
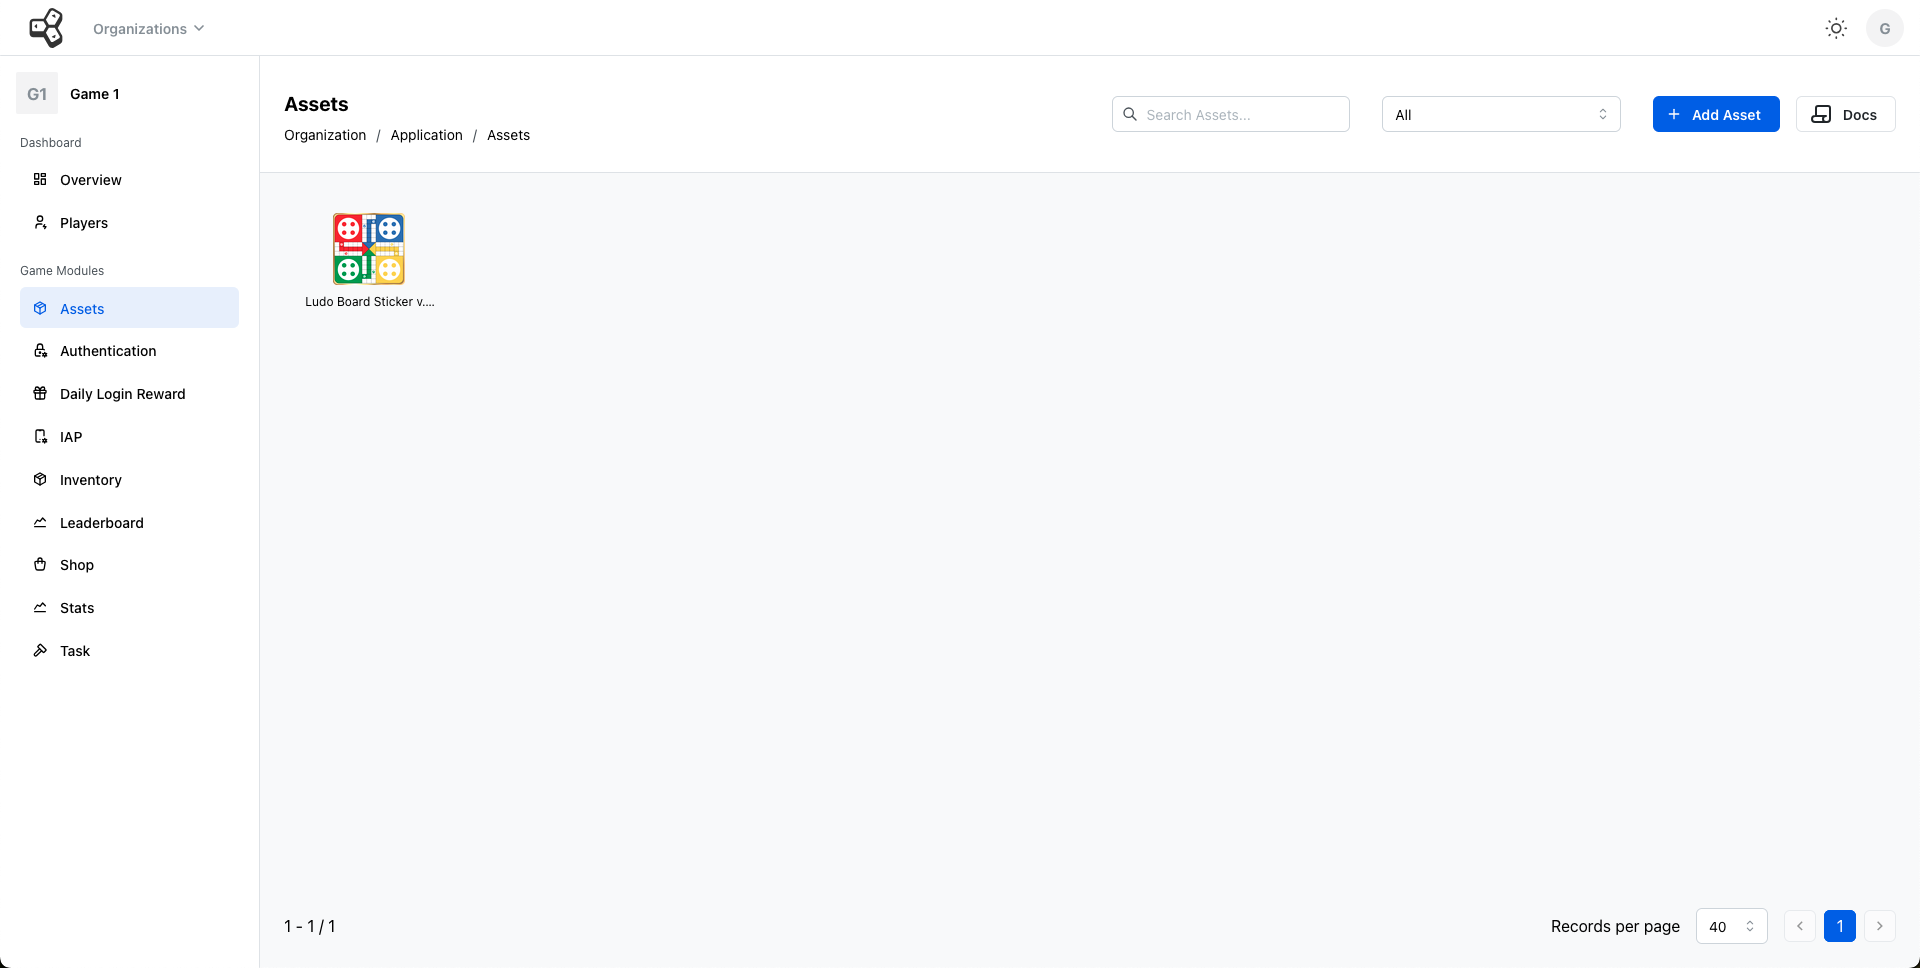
After clicking Submit, you’ll be able to view and access all the uploaded assets in a gallery view.
As the modules are interlinked with each other, the Assets module plays an important role in setting up your inventory catalogue, in-game shop products and more.
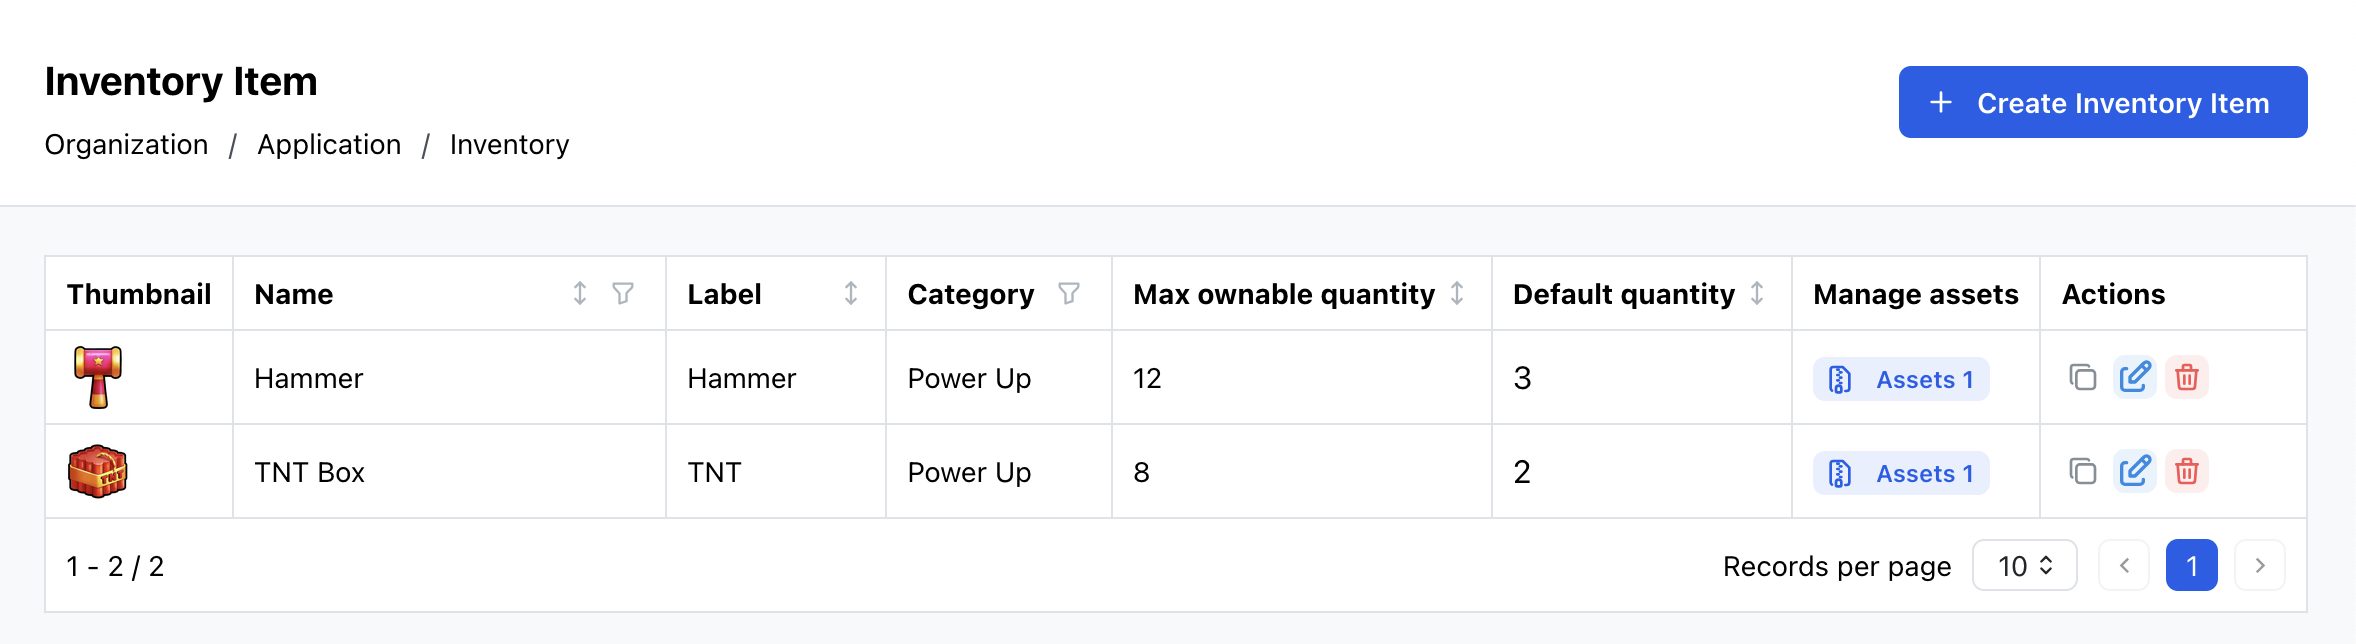
Inventory
Bring the game assets in action with the help of the Inventory Module.
Game assets encompass various elements such as characters, items, and resources, which are managed and utilized through the Inventory Module. Define the game assets and how they interact with the users in the overall game environment with the help of this module.

Each item must be added individually and provided with its specific description based on the item type. There are multiple fields listed for including other descriptive labels that helps in identifying and defining them.
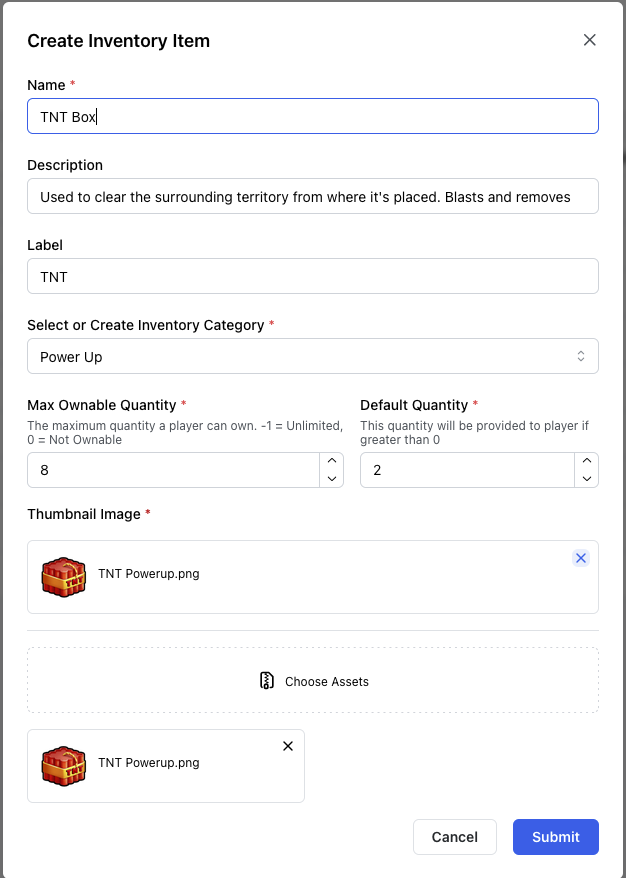
Fields marked with an asterisk (*) is mandatory to be filled out.
You can define your inventory items based on the following titles:
- Name: Name of the inventory item.
- Description: Describe the use of the item in the game.
- Label: Unique label to identify the item.
- Inventory Category: Category the item falls under. You can create custom categories to group your inventory items for proper organization.
- Max Ownable Quantity: The maximum quantity of an item a player can own. A value of -1 indicates that the player can own an unlimited amount of the said item, while a value of 0 indicates that the item cannot be owned. Any positive value greater than 0 specifies the exact amount of the item that the player can own.
- Default Quantity: Any value specified in this field will determine the amount of the item the player receives by default.
- Thumbnail Image: The image used to represent the item.
- Choose Assets: Items from the Assets module that will act as the stated item.
Daily Login Reward
The Daily Login Reward module allows you to customize the rewards offered to players. You can add spendable or usable items that enhance gameplay, making it more interactive and interesting for your players.
To customize and send the rewards to the players, click on the Create Login Reward button and select the items added on the Inventory module, specify their quantity, and click the Submit button after adding the items.
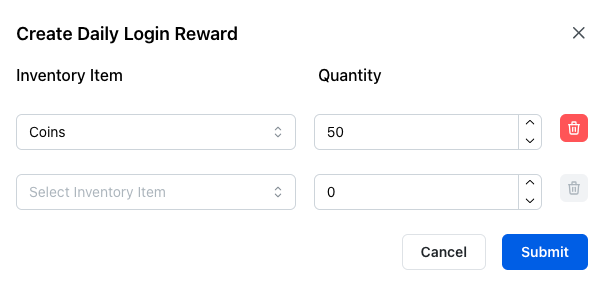
We’ve added 50 coins as a reward to the players on their first day of login. You can also add multiple items to reward the players in a single day.
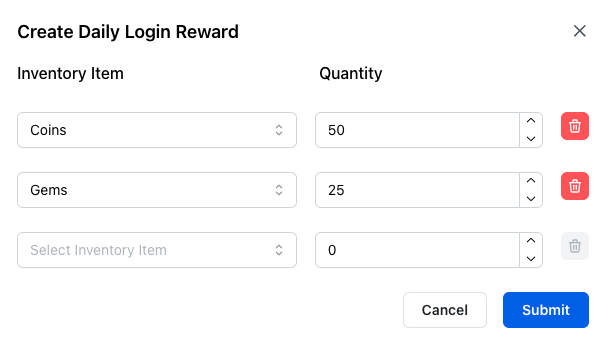

Here, we added 50 coins as the first day login reward, and 50 coins and 25 gems as the second day login reward. Similarly, you can manually add login rewards for each day, one day at a time.
Shop
Monetize and promote your in-game items with the Shop module. These items can be purchased with in-game currency or microtransactions.
You can add items to your shop based on two options:
Buying with in-game currency
Players can use their coins, gems or any other in-game currency item from the game to purchase the items listed under this option.
Follow the mentioned steps to add such items in your Shop module.
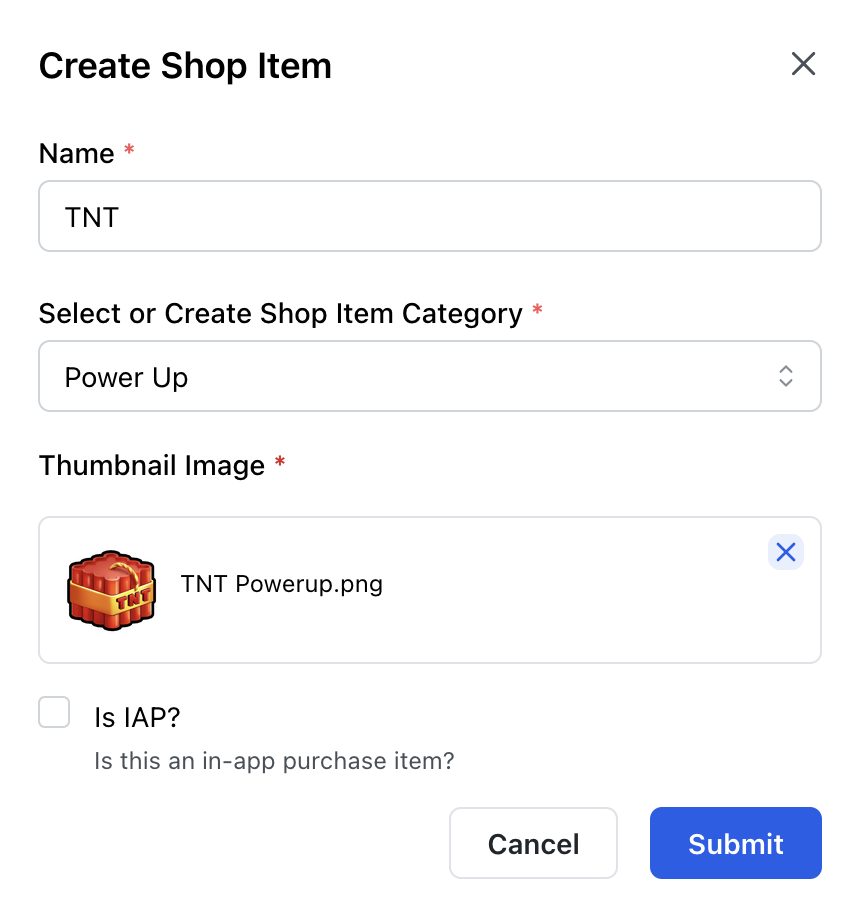
Click on Create Shop Item at the top right and fill in the empty fields and submit it as per your requirement. An example for the TNT item has been showcased.
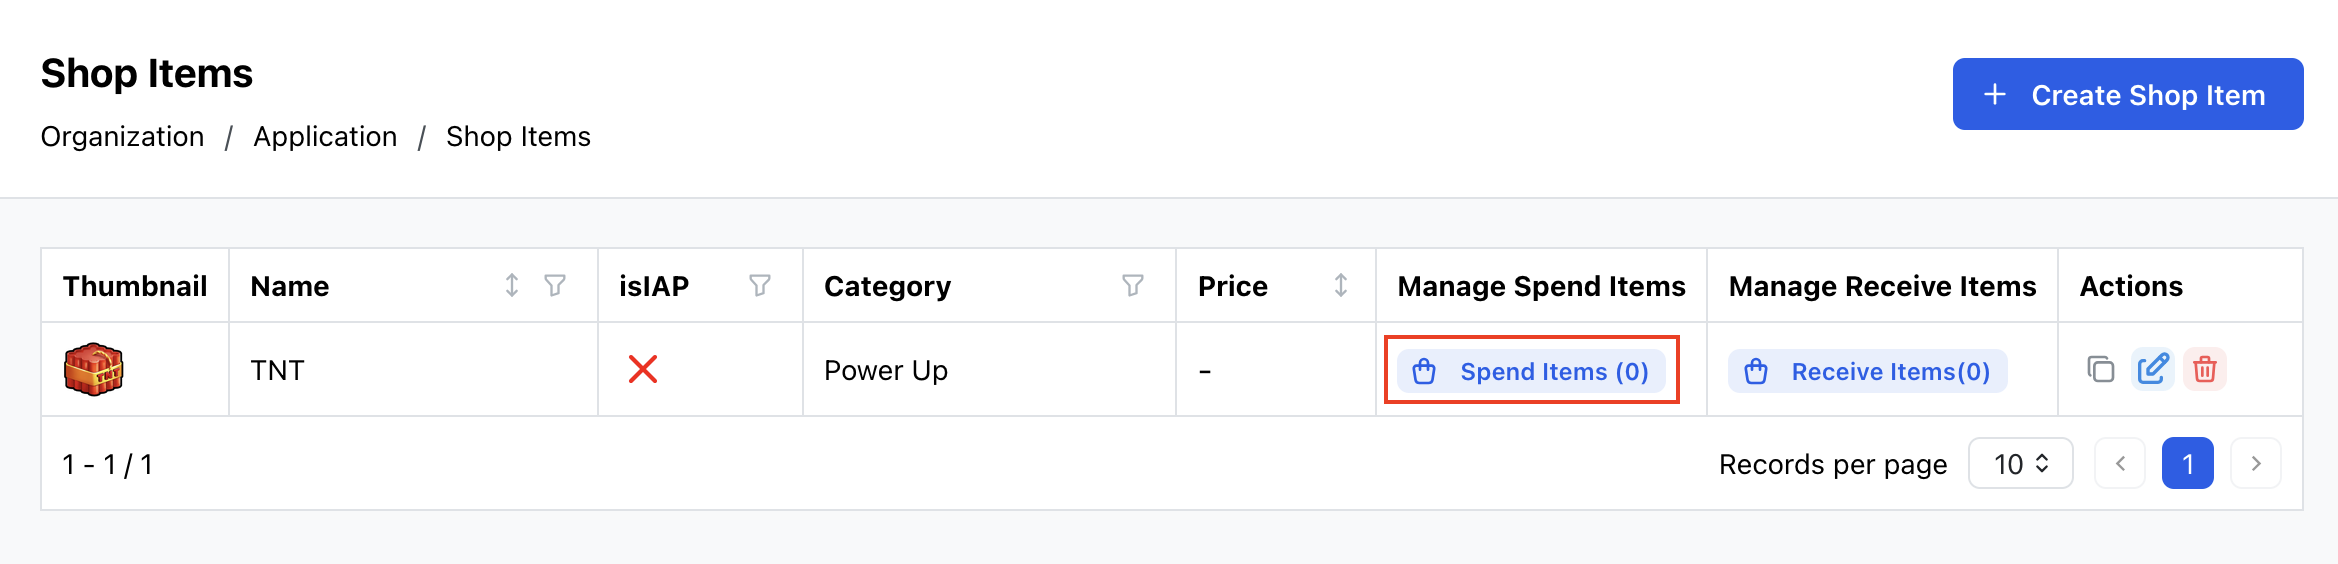
For an item that can be purchased with in-game currencies, click on the Spend Items button.
Next, click on the Create Shop Spend Item button to add the accepted in-game currency needed to purchase the TNT.
If the in-game currency item has been added to your Inventory module, you can find the option in the drop-down menu under the Inventory Item title.
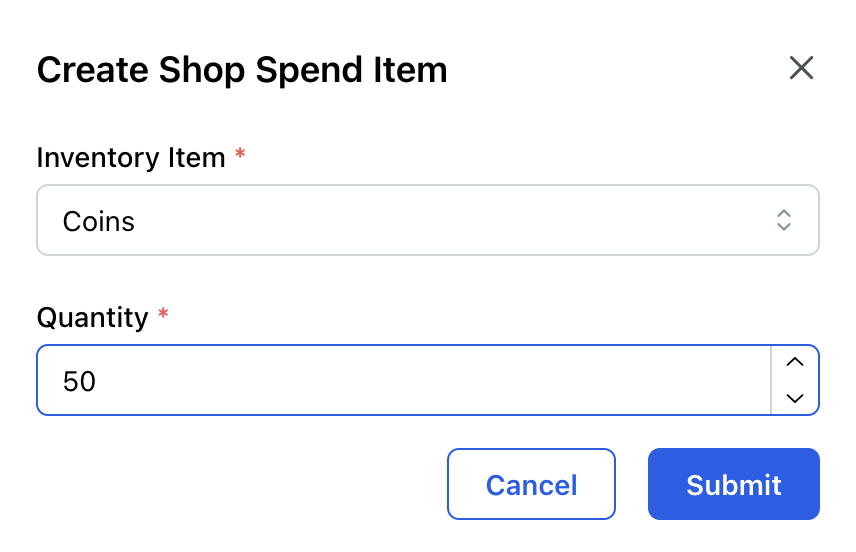
Choose the currency item, specify the amount needed to purchase TNT, and click on the Submit button to save the entered data. You can add individual or multiple spend items as required.

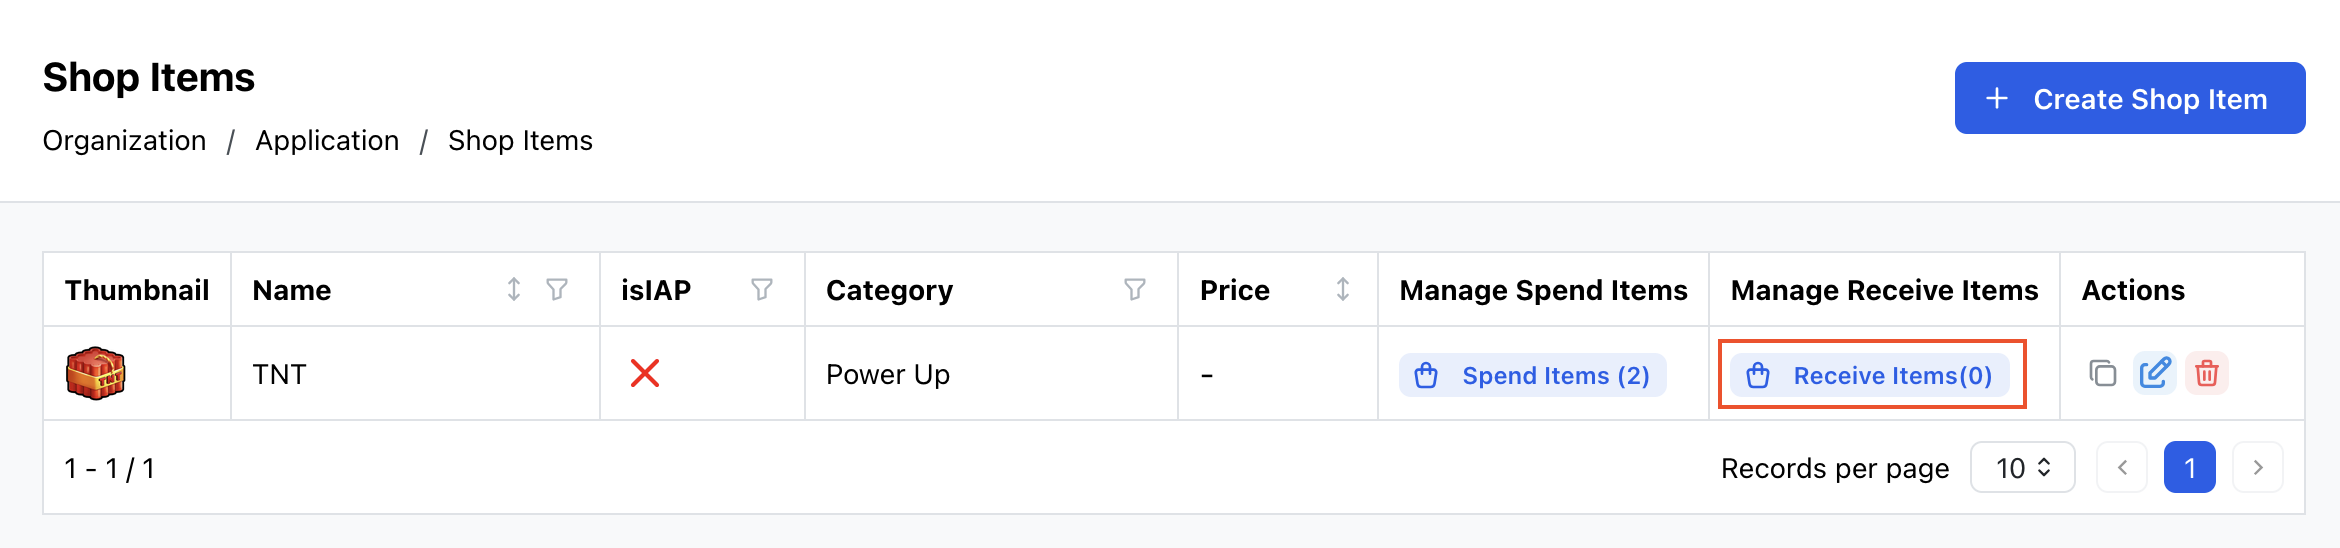
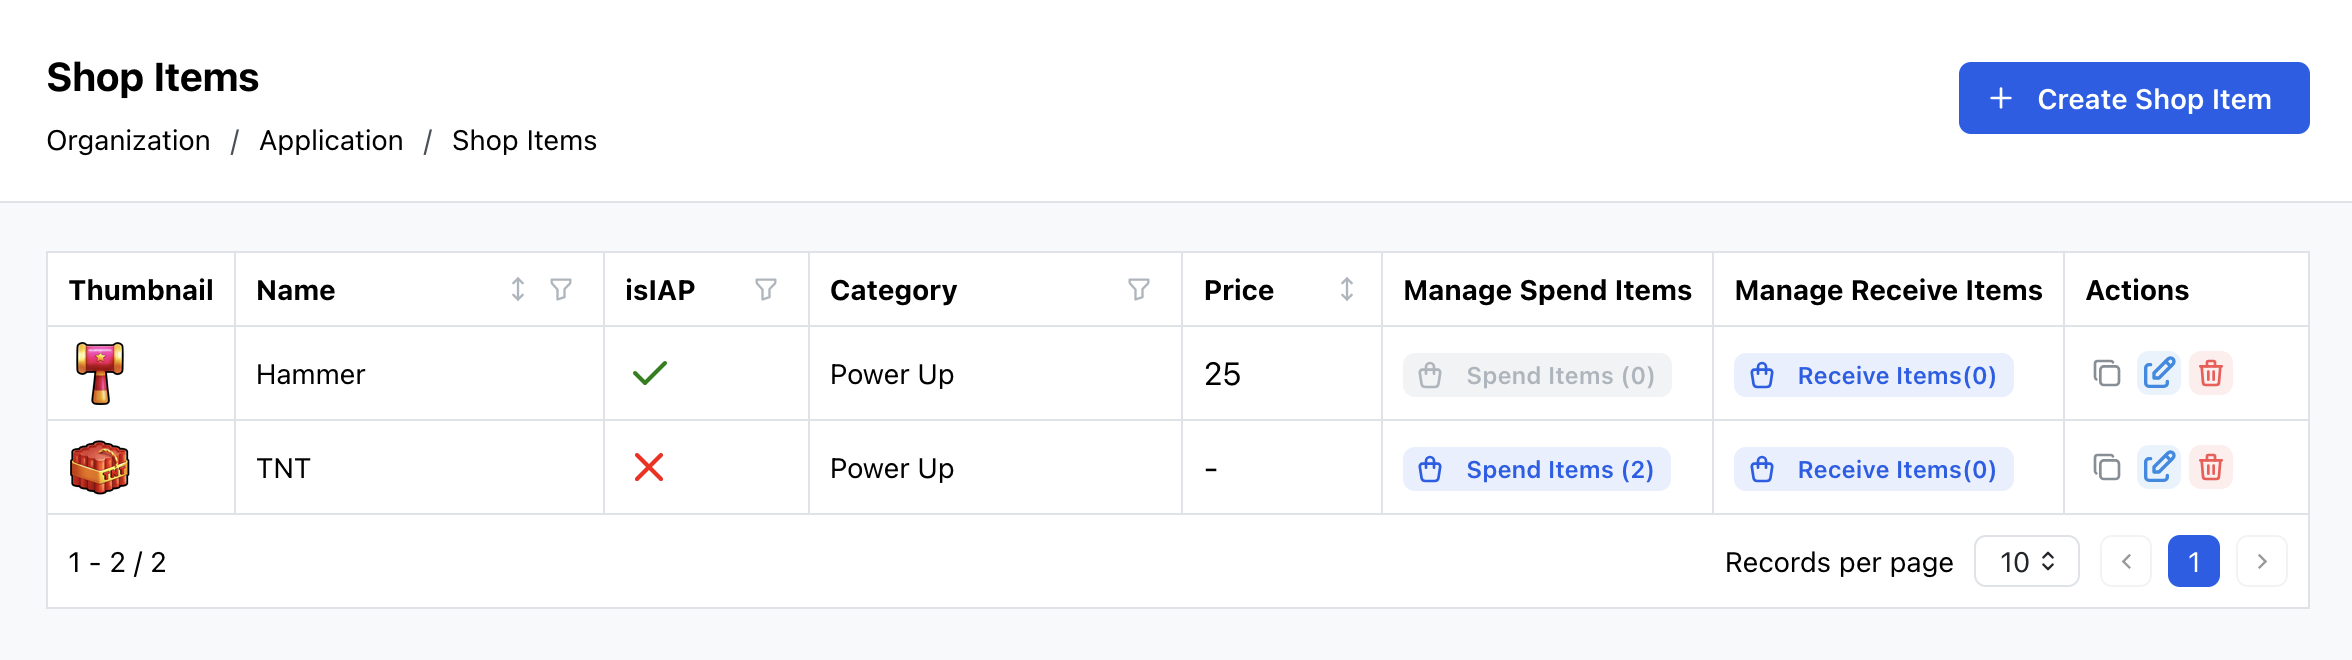
This implies that to purchase TNT, players need to spend 50 coins and 20 gems.
Likewise, you can create a shop bundle by including two or more receivable items from the Receive Items option. For instance, you can create a "Destruction Bundle" containing TNT and the Hammer.
Buying through in-app purchase
Showcase your items for sale with the help of the IAP option.
Simply follow the aforementioned steps to add an item and enable the IAP option to feature it in the shop as an in-app purchase item.
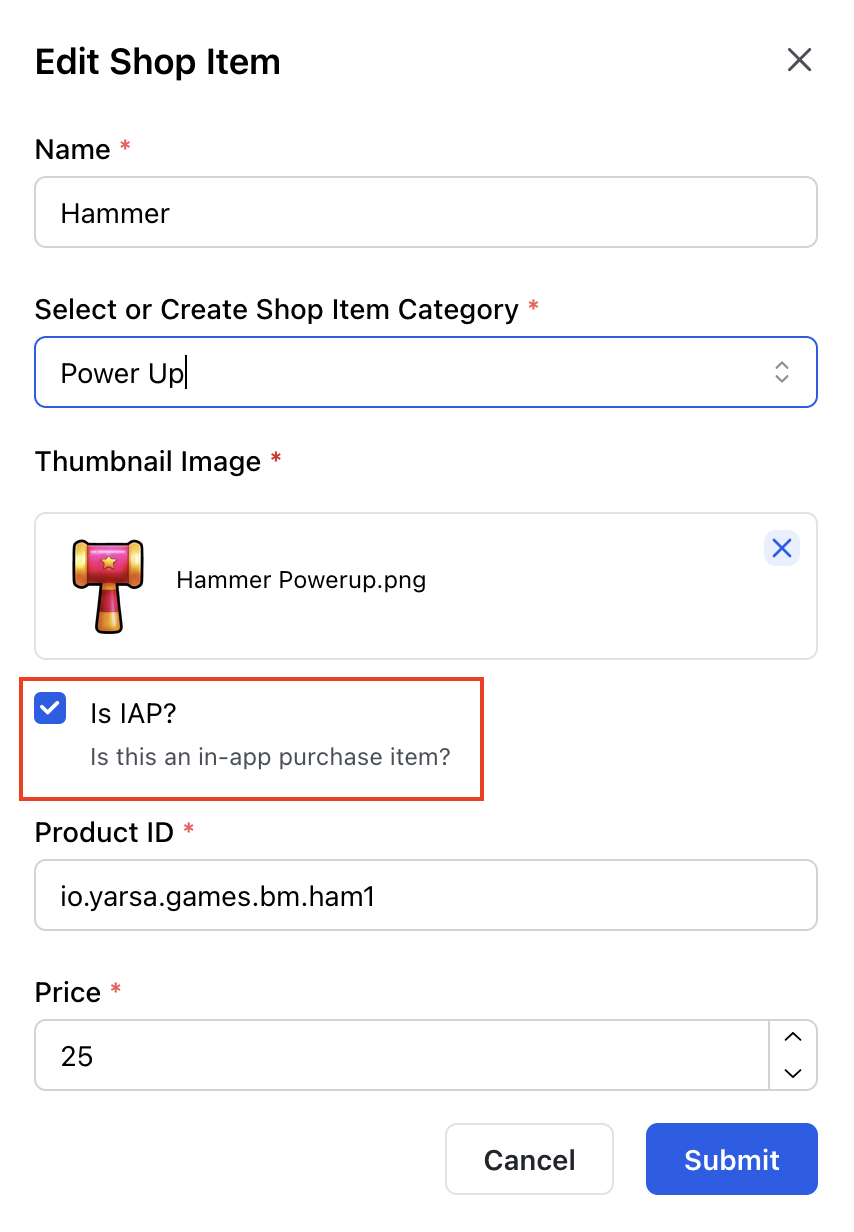
Provide your custom Product ID, which will be further linked to the designated platform, and set the price of the item in cents (USD). The IAP items can also be an individual item or an item bundle.
The added items can be viewed in a list format.
Stats
Statistics, usually known as stats, are those statistical data that are gathered from an app in order to analyze the player’s progression and performance over time. These metrics provide insights and fuel other modules that tracks player’s achievements, skills developed, and decision-making behaviour.
As per your app or game requirements, you can customize any stats data. To create your custom app stat, click on the Create Stat button, and add the details of the stat.
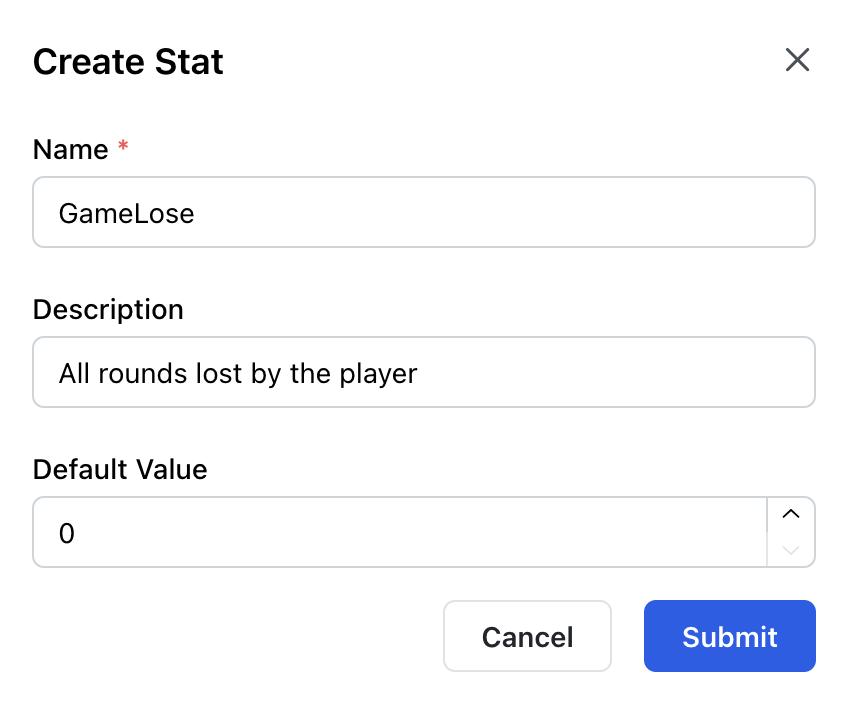
Created stats in the Stats module is interlinked for other modules to function. Leaderboard depends on stats to determine player’s position based on their progress and Task, to create missions.
Leaderboard
The Leaderboard module defines a player’s position based on the data received from the Stats module.
Leaderboards can be created from multiple game stats like max game wins, max kills, max game items picked, and anything else that suit your needs.
An example for maximum game wins of all time is showcased below for better understanding of the leaderboard module.
Click on the Create Leaderboard button and fill in the empty fields.
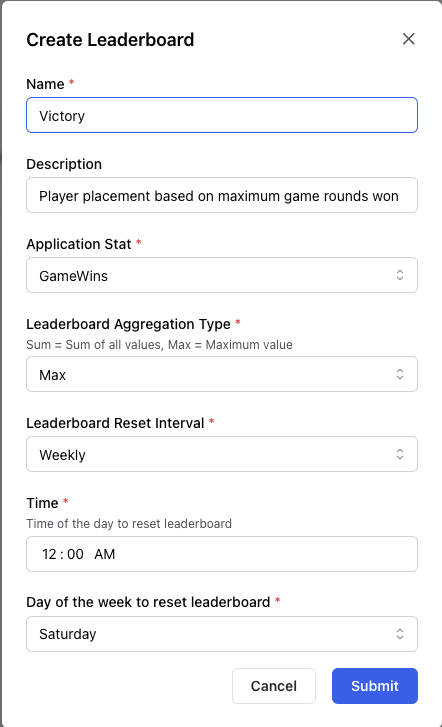
The fields are further classified and described as:
- Name: Custom name of the leaderboard.
- Description: Describe the criteria used by the leaderboard to rank players.
- Application Stat: Choose the pre-defined stat type from Stats module. In the example, the Victory leaderboard uses GameWins stats to determine the player’s position based on the maximum amount of games won by the player.
- Leaderboard Aggregation Type: Determine whether the leaderboard uses the maximum value or sum value of the selected stats. The Victory leaderboard uses Max value, implying that the placement will be based on maximum number of wins attained by a player within the set time frame, i.e., Weekly.
- Leaderboard Reset Interval: Select a time frame to reset the leaderboard data. With the weekly reset interval chosen under the Victory leaderboard, the record is erased after the selected time frame.
- Time: Choose the time of the day to erase the data.
- Day of the week to reset leaderboard: Specify the day of the week or month for resetting the leaderboard based on your selected time frame.
- For Weekly resets, choose the preferred day of the week. For Monthly resets, select a day between 1 to 28 of the month. Opting for Daily resets clears data every 24 hours, while selecting Never retains data indefinitely unless the leaderboard is deleted.
Task
The Task module is designed for creating interactive missions that engage gamers in a give-and-take format. Developers can design either standalone elaborate tasks or break them down into smaller sub-tasks. Completing these tasks rewards gamers with various incentives.
The Stats module acts as a base for creation of the mission that the Task module runs on.
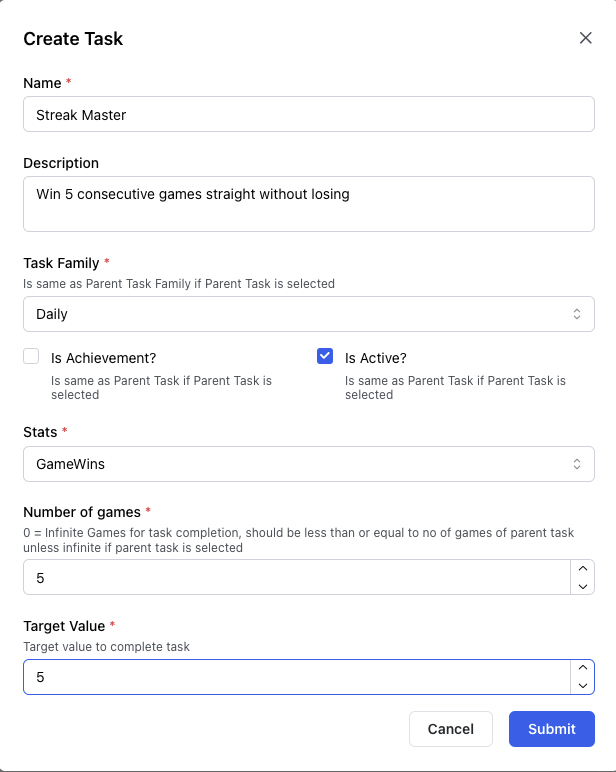
The Task module provides a flow with these fields:
Name: Custom name of the task
Description: Specify the objective of the task
Task Family: Choose whether the task is assigned Daily, Weekly, Monthly, is a Seasonal task or appears once a game, making it a Lifetime achievement.
Expiration day and time of task families are:
- Daily: 12:00 am
- Weekly: every Sunday 12:00 am
- Monthly: every first day of month 12:00 am
- Seasonal: comes from season end date from table application season.
Achievement Tasks: If the task is designed as a one-time task and can be considered an achievement.
Active Tasks: There are two types of tasks that can be separated based on their status. Active tasks can be assigned by the client to the players, whereas inactive tasks cannot be assigned with an API call but can be created and listed under the Task module for future use.
Stats: Choose the stats from the Stat module providing the basis of the task actively in creation.
Number of Games: Specify the number of games required to complete the task. A value of 0 indicates an unlimited number of games for task completion. However, for subtasks, the number of games must not exceed the amount specified in the parent task, unless the parent task allows for an unlimited number of games (i.e., 0 games).
Target Value: Set the target value needed to be met for mission completion.